Fantastical 2

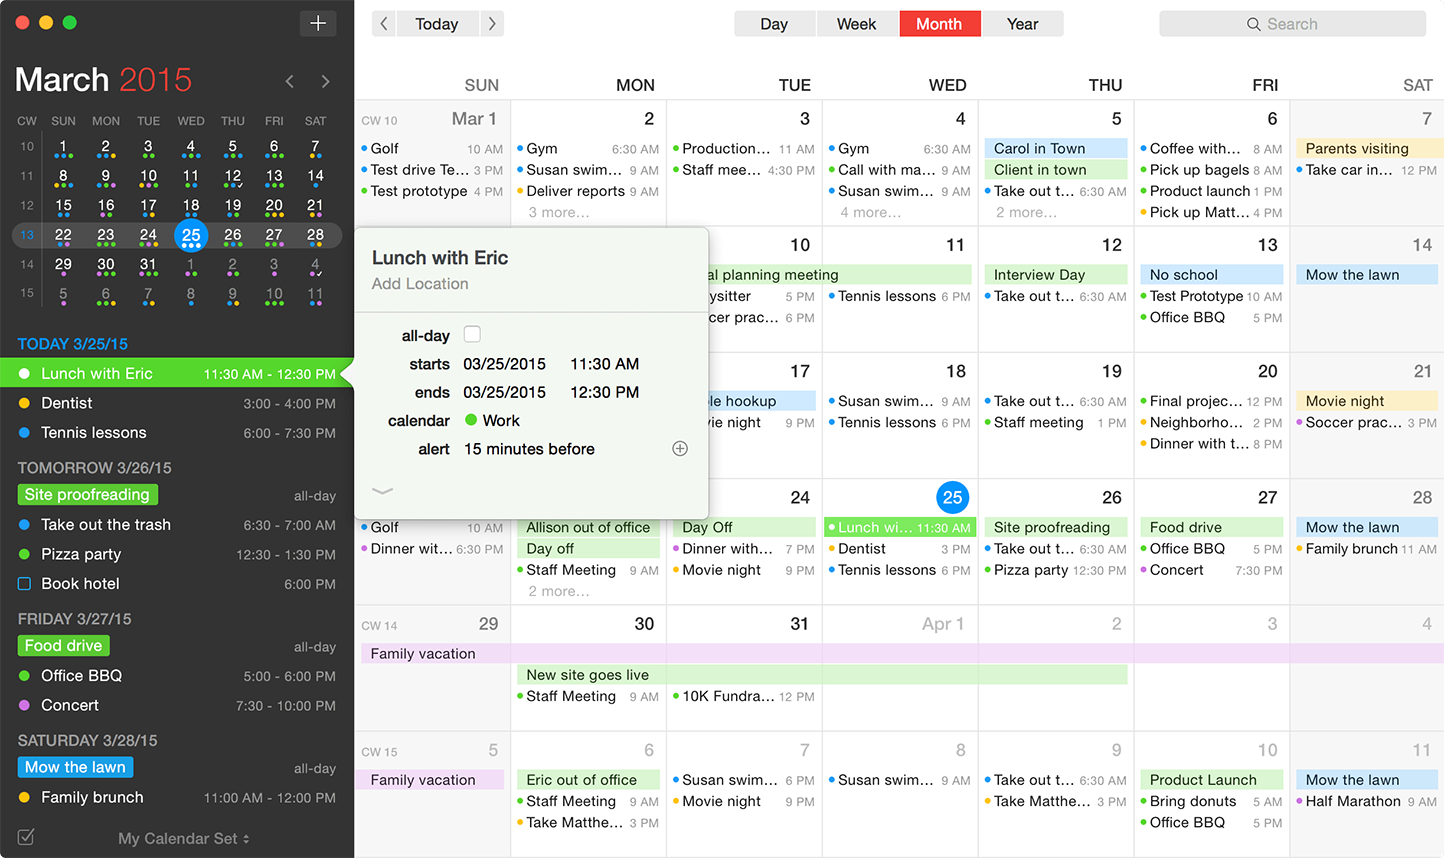
I have personal calendars (iCloud), some of which are shared with my wife, I have business calendars (Google), and I have shared client calendars (usually Google). I don’t spend a lot of time creating events, but I do spend a lot of time glancing at my calendar to plan the day/week/month. Both of these use cases are made significantly easier with Fantastical.

If you’ve never heard of Fantastical you might be living in a cave, but I’ll give you the elevator pitch: Use natural language to create events in a menu bar app that shows your calendar and reminders. It’s non-intrusive, easy to use and very fast. Creating events by typing “Lunch with Jim Friday at 12pm” is much faster than clicking four times in Calendar.app.

Viewing your events and reminders in the menu bar popover worked very well for the current day (and for looking at specific days in the future) but it broke down for me when planning out a month or looking farther ahead. Often I found when I wanted to look at my calendar, I was opening Calendar.app instead, which meant I was using Fantastical only to create events in my workflow.

Enter Fantastical 2 with its brand-new full calendar view:

image

Not only does it implement basically the entire Calendar.app feature-set, but it looks nicer to boot. Now Fantastical 2 is a complete solution for both event creation and viewing your complete calendar. Version 2 has a Today Widget, a Share Extension, calendar groups, and a ton of other new features, but for me the full calendar made this a no-brainer upgrade.

You can buy Fantastical 2 from the App Store from Flexibits directly.

System Menu Bar Options

image

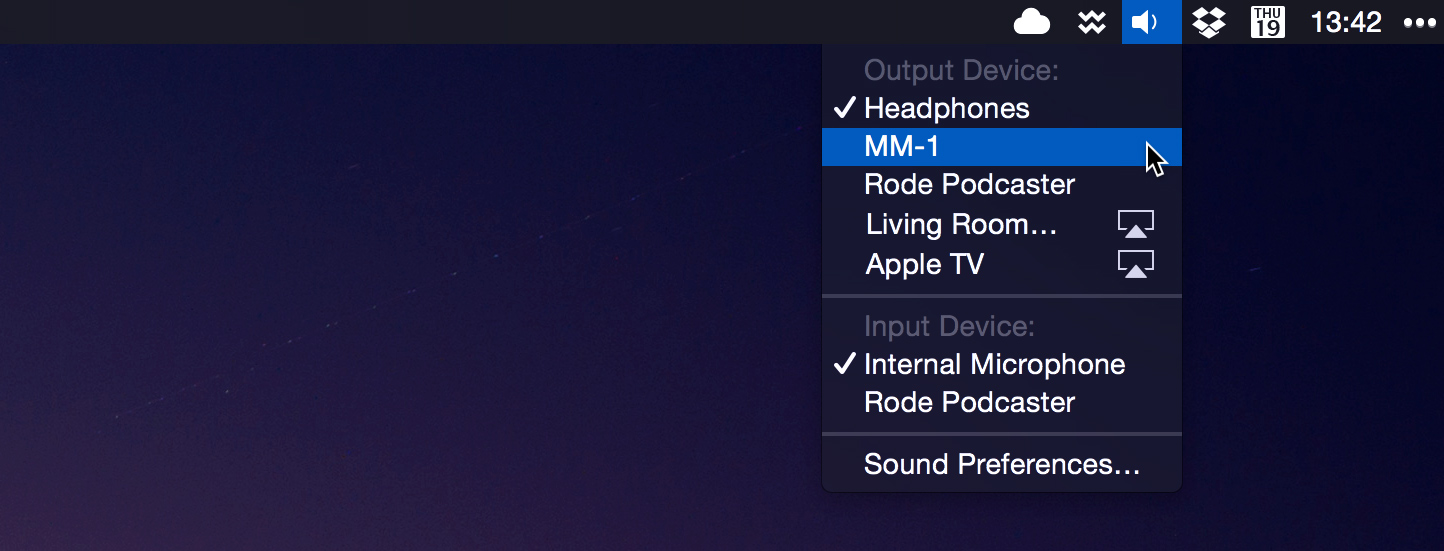
Have several audio sources connected to your Mac? Maybe some USB speakers, a pair of headphones and a podcasting microphone? Have a few Airplay devices in your house? Next time you want to change your input or output device, don’t bother with System Preferences → Audio. Just hold while clicking the volume icon and you’ll see a list of available devices.

While we’re at it, holding while clicking on many of the system menu bar icons will provide useful information:

  • Bluetooth will show detailed device information and allow you to create a diagnostic report
  • Wi-Fi will show detailed information about your current Wi-Fi network (including noise level and transfer rate) as well as your Mac’s network configuration from that network (IP address, etc), as well as detailed device information and diagnostic options
  • Battery will display the battery’s condition
  • Notification Center will toggle DND mode

And don’t forget: Most system menu bar items can be reordered by holding and dragging. For more control over the layout, use something like Bartender.

The Screenshot Spectacular

If you’re a designer, you probably take a million screenshots a day to share with co-workers like I do. Even if you’re not a designer, you’re likely to need to share your screen or a section of your screen from time to time. Nearly everyone knows about OS X’s built-in support for screenshots, but most people don’t know just how robust it is.

There are two types of screenshots: whole display (or displays) and a selection or UI element (window, menu, etc). By default, these are mapped to the numbers 3 (whole display) and 4 (selection) in shortcut key combinations.

Screenshots will appear as PNG files on your Desktop. This can be configured (see below), or you can skip file creation by adding to any shortcut combination—this will copy the screenshot to your clipboard instead, allowing you to paste the image directly into apps like Preview, Sketch or Adobe Photoshop.

In addition to the shortcuts listed below, OS X includes an app called Grab (find it in Applications/Utilities) which, while outdated, contains a few other tools like a 10-second timer and the ability to include your cursor in the screenshot.

Whole Screen

To take a screenshot of the entire display (and, if you have multiple displays, this will take a shot of each one): ⌘⇧3

Selections and UI Elements

To take a screenshot of a selected area, first press ⌘⇧4 and then drag a selection. But it gets better! During the selection, you can press and hold to lock the selection area in a certain dimension (pressing and dragging left/right will lock the height of the box while up/down will lock the width of the box). You can press to scale the box from the center instead of an edge, and you can combine both and to grow the box from the center while locking it by a dimension. We’re not done yet! On top of all of this, you can also hold down the spacebar and move the selection area freely around the screen. Whew. There’re a lot of options while using ⌘⇧4’s selection area, so let’s review in a tidy list:

  • : Lock selection area width or height
  • : Scale selection area from center
  • ⇧⌥: Scale selection area from center, locked by width or height
  • Hold down spacebar: Free-move selection area

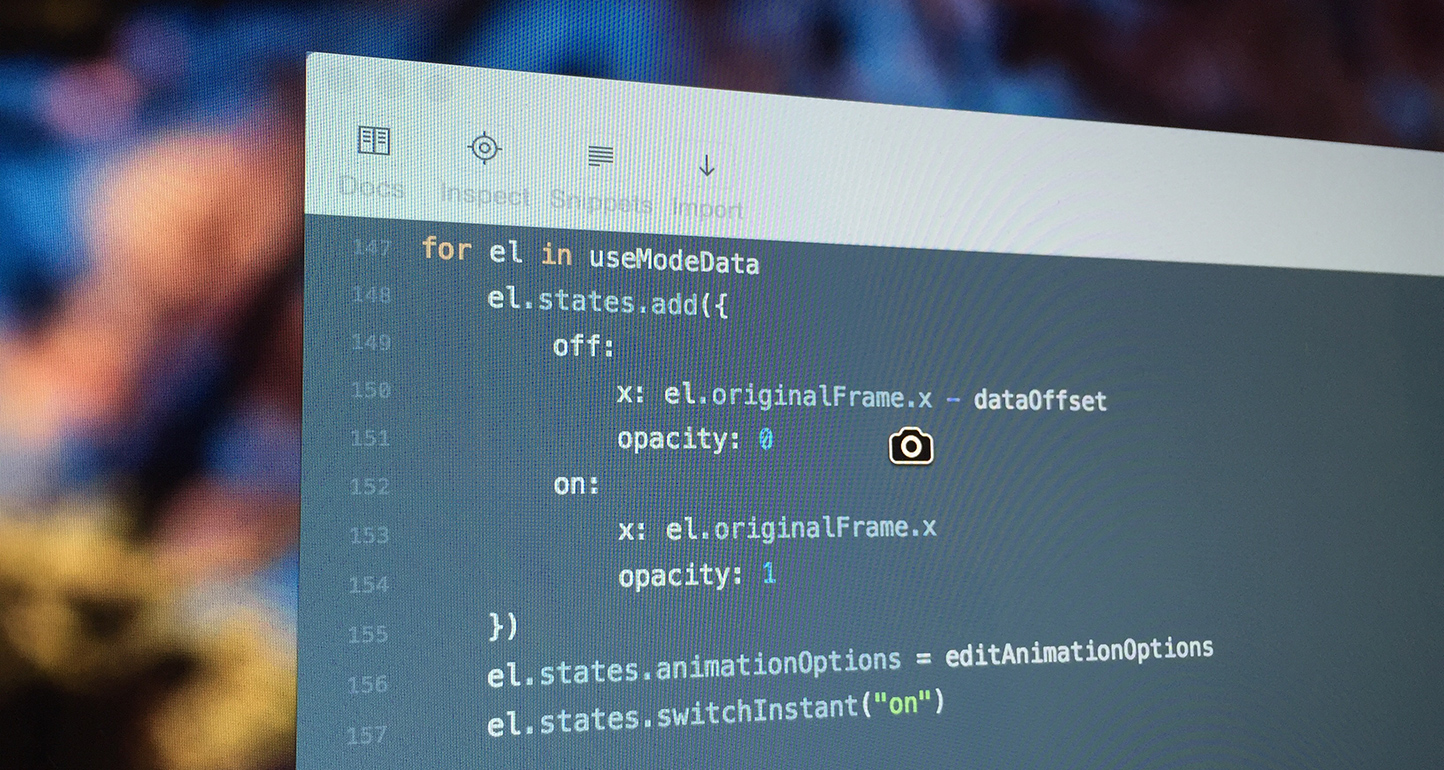
Finally, if you want to take a screenshot of a specific window or menu, you can use the selection shortcut (⌘⇧4) but then tap the spacebar once. This will change your cursor to a camera and whatever you hover over will be highlighted (windows, the menu bar, the dock). Clicking your mouse will take a screenshot of just that item:
image

If you want to go back to selection mode, just tap spacebar once again. Just note: When capturing a window with this screenshot mode, OS X will include the window’s shadow. If you want to disable this for good, you’ll need to run two Terminal commands:

defaults write com.apple.screencapture disable-shadow -bool true
killall SystemUIServer

If you want to disable shadows for only the current screenshot, hold before clicking a window. (Thanks, Matthew Price!)

At any time while taking a selection- or UI-element-based screenshot, you can press to cancel.

Remember, using ⌃⌘⇧4 supports everything above, but stores the screenshot in your Clipboard instead of creating a file.

Different Shortcuts

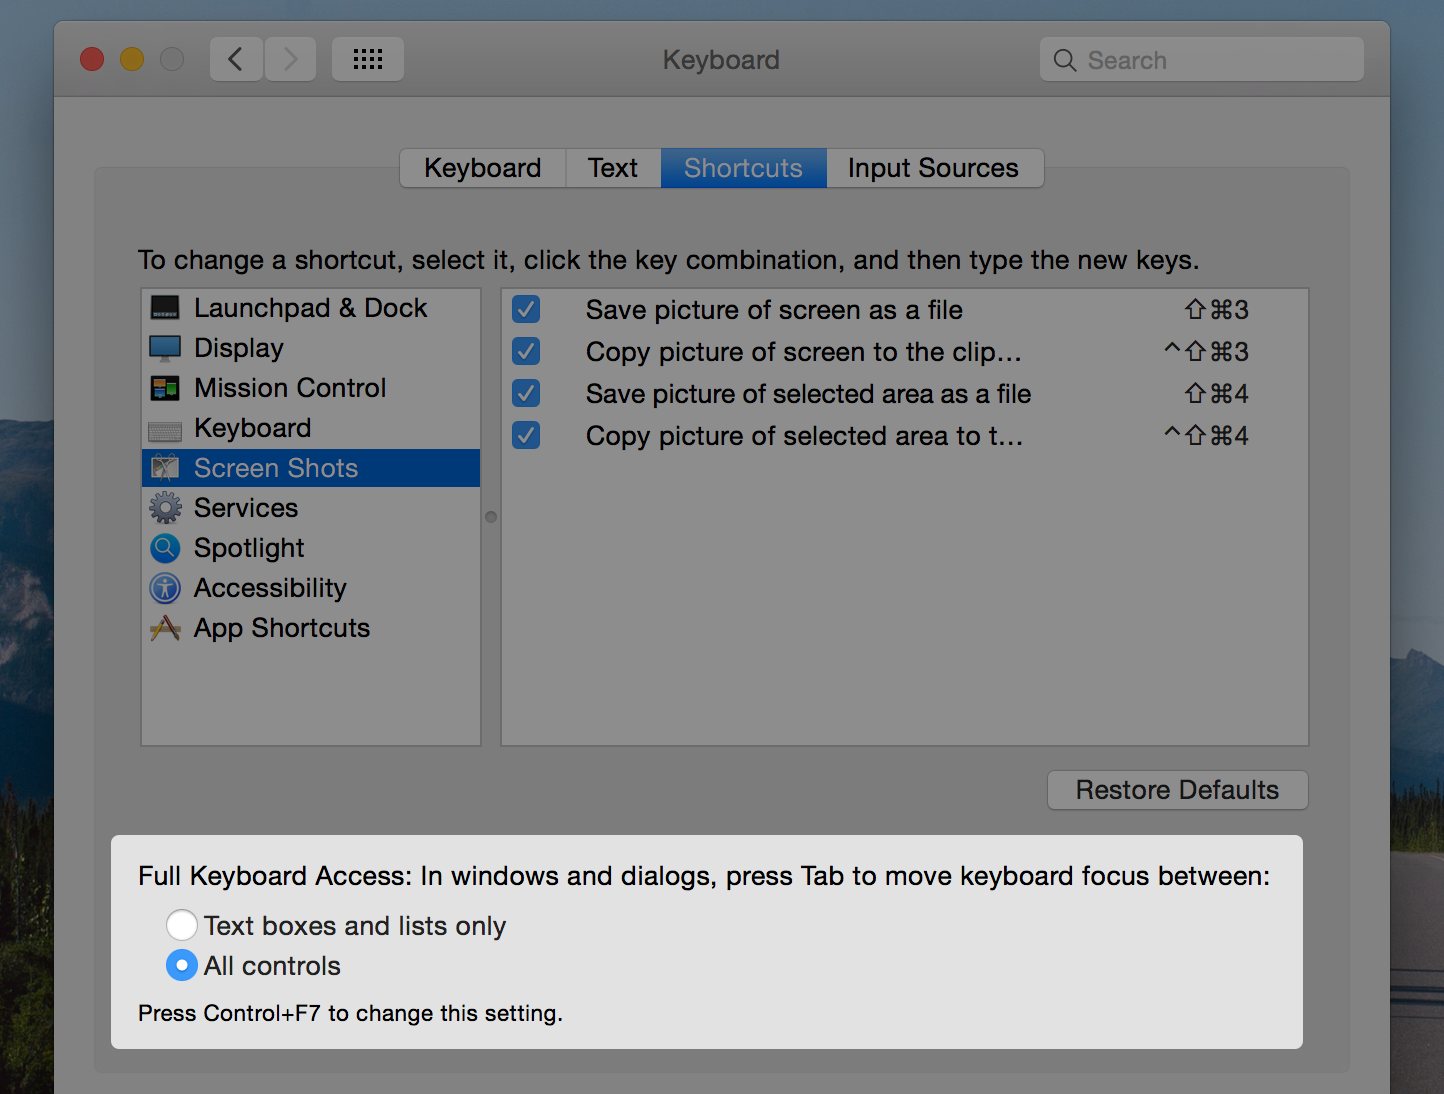
Don’t like ⌘⇧3? You can change the keyboard shortcuts for screenshots in System Preferences → Keyboard → Shortcuts. Just click “Screen Shots” (sic) in the source list and change anything you wish.

Put ‘Em Somewhere Else

As stated, by default, screenshots save to your Desktop. But if you’re like me and you take a lot of screenshots every day, this gets unwieldy pretty quickly. Thankfully, you can easily change the location OS X saves screenshots to with this handy Terminal command:

defaults write com.apple.screencapture location ~/Pictures/Screenshots/
killall SystemUIServer

It’s up to you to make the ~/Pictures/Screenshots/ path whatever you want it to be. To make this easier, you can also just type a space after location and then drag a folder from Finder into Terminal to automatically add the path for that folder so you don’t have to type it out.

You can also change the type of files saved or the filename prefix using Terminal commands.


There are a lot of utilities out there for doing something with your screenshots after you take them, but we’ll dive into those in the future. For now, hopefully these screenshot tips will make you more productive.
Weekly Update Wednesday

Since the launch of Useful Mac, I’ve been receiving lots of great feedback, suggestions, questions and, most notably, further info or suggestions based on what I’ve posted. Consider this the first of many Weekly Update Wednesdays. Let’s dive in:

Another Modal Escaping Tip

Lots of people wrote in after the post on modal escaping tips to add more useful information to the pile: While works as the cancel action in nearly all modals, most also support the oldest keyboard shortcut for the cancel or stop action on the Mac, one you’re probably most familiar with from web browsers (up to and including Safari): ⌘.

(Thanks to Clayton, Alexander Deplov, Tobias Hagemann, Aaron Holtzman, Michael Khaw, roosto and wesorcerers for writing in.)

Caution When Replacing Signed Apps’ Icons

Reader (and terrific designer) Ged Maheux wrote in on Twitter suggesting caution when customizing icons in OS X, with regard to sandboxing and app signing. It’s not entirely clear what the ramifications are for changing system-level icons at this point, so tread carefully. (It should be noted that, so far, folder changes have not caused an issue for me.)

That Green Button

In the zooming tips post, the original question from Anonymous said:

How can I change the green button in Yosemite to maximise when clicking and full-screen when opt-clicking? (Inverse the default behaviour)

But a lot of people breezed past the question and read only the answer, so I got a lot of emails letting me know that while the green button in Yosemite makes a window full-screen, -clicking the green button maximizes it instead. In the future, I’ll try to make sure little tidbits like this are clearer in the body of the post.

Additionally, I mentioned the double-click approach to zooming windows:

In most apps, double-clicking the window’s titlebar (or, in Yosmite, the combined tool/titlebar) will zoom. Not every app supports this, but in my testing this morning, most did. Once zoomed, double-clicking the tool/titlebar again will un-zoom.

This will only work, however, if the “Double-click a window’s title bar to minimize” option is disabled in System Preferences → Dock.

(Thanks to Mark Allan, dwightk, edwardloveall, Josh Hrach, Andreas Kalt, obvioustrickster, reallongwayaround.)

A Few Reminders

Anonymous asked:
How can I change the green button in Yosemite to maximise when clicking and full-screen when opt-clicking? (Inverse the default behaviour)

Unfortunately, there’s no defaults setting to reverse the functionality of the green button, so you’re out of luck. That said, there are a few things you can do to work around this:

Double-Click

In most apps, double-clicking the window’s titlebar (or, in Yosmite, the combined tool/titlebar) will zoom. Not every app supports this, but in my testing this morning, most did. Once zoomed, double-clicking the tool/titlebar again will un-zoom.

Use the Keyboard

You can set your own keyboard shortcut for the Zoom menu item globally, and any app that supports it will use the shortcut. Open System Preferences, navigate to Keyboard → Shortcuts. Select “App Shortcuts” from the source list, and then click the add button. Keep “Application” set to “All Applications”, for “Menu Title” enter “Zoom” (no quotes) and then set your preferred global keyboard shortcut. I’d recommend ⌘⇧M since it’s the inverse of the standard Minimize shortcut, but it’s up to you.

3rd-party Help

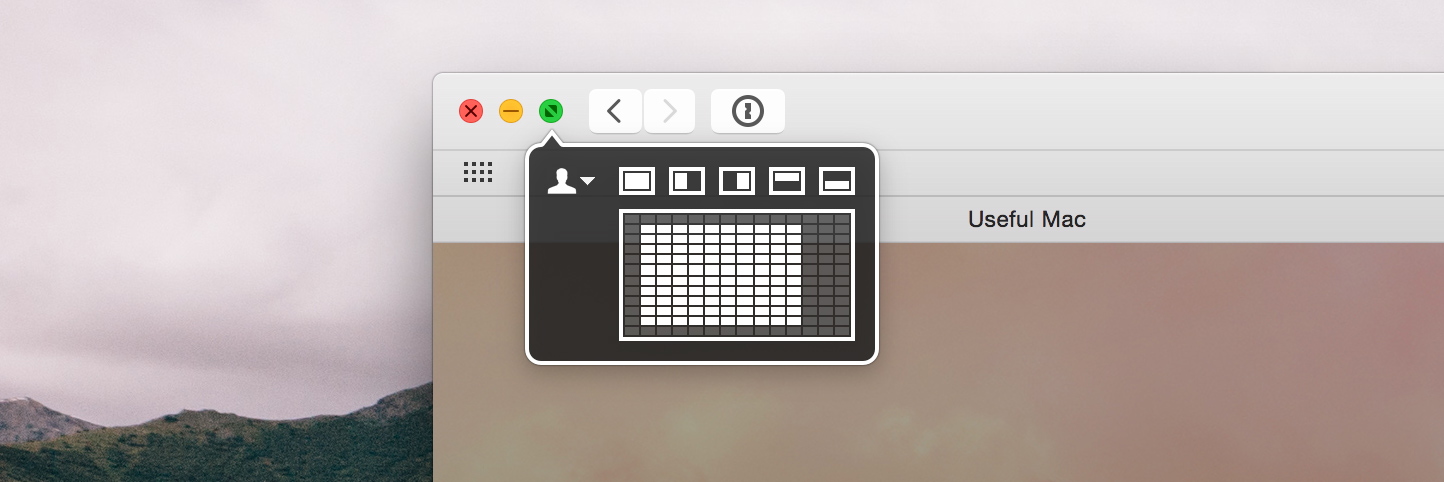
Install a tool like Moom. Moom adds a popover to the green button which allows you to quickly resize the window, zoom it, move it to a quadrant, et cetera. Moom supports keyboard shortcuts, storing custom layouts and more. You can read more about Moom here on Useful Mac.

Moom

image

Moom is a terrific utility for moving, zooming and organizing windows. It hides in a popover on the standard green toolbar button and with a single click can move a window to the left half of the screen, the bottom right quarter, and, with extensive customization options, just about anywhere you want. You can also enable a grid (seen in the screenshot above) which allows you to drag an exact size/zoom for any window, a feature I use constantly.

Create your own window layouts (I have one for my auxiliary apps that live in a second space like Rdio and Reeder) and use it to automatically snap multiple windows into a preferred arrangement. Assign custom shortcuts to layouts or positions, use anchoring… look, I could talk all day about how Moom allows you to take complete control over your windows but it would be easier for you to spend the $10 and buy it.

I’ve been using Moom for many years now and find it invaluable in my daily workflow—I bet you will too.

Glacier Icon Pack

image

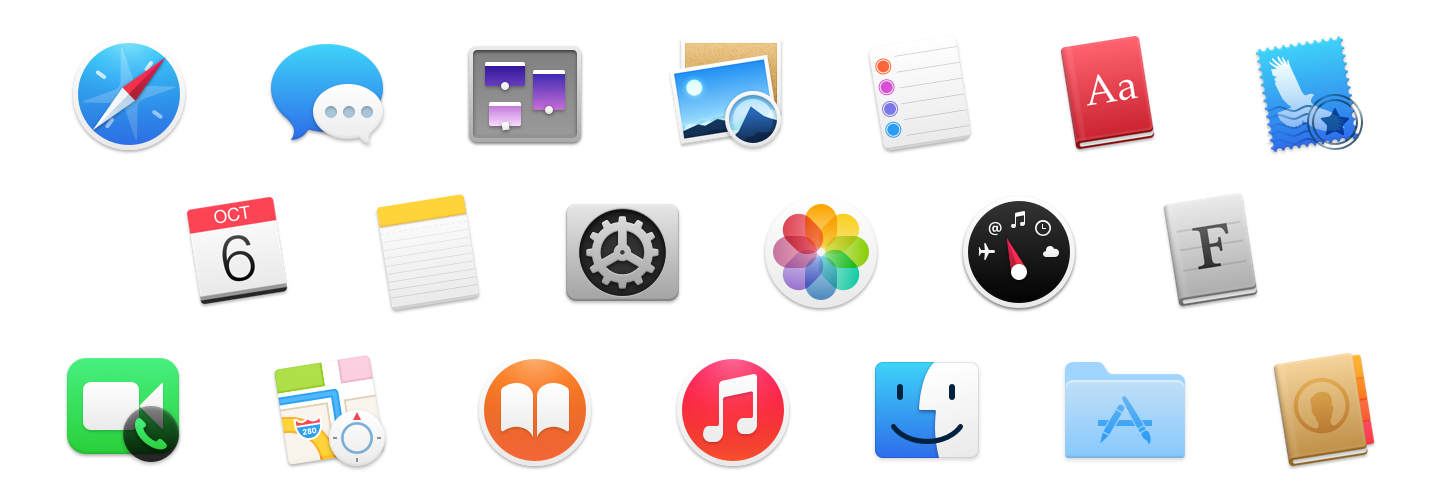
Designed by Seb Jachec and CJ Melegrito, Glacier is a system replacement icon set designed for Yosemite:

Bringing together the clean simplicity of Yosemite and the delightful details of OS X versions past, these icons are a testament to the styles of new and old.

Glacier isn’t a radical departure, it’s a fine-tuning of Apple’s current iconography, and it’s very subtle and very successful. The set is free, and for a mere $5 you can download Sketch files for every icon which is a steal. I’ve been using these icons system-wide and I especially love the folders and tweaked Finder icon.

To customize your system with these icons, Useful Mac recommends using LiteIcon.

LiteIcon

Years ago, the one true tool on OS X for changing system icons was CandyBar, but that app has been discontinued. These days, LiteIcon does the job just fine, albiet without the UI bells and whistles.

Much like CandyBar, LiteIcon makes it simple to change system, folder and volume icons, as well as set custom icons for any of your applications. You can also revert back to original icons at any time with a single click. It’s completely free and currently the best way to change icons on your Mac.

Anonymous asked:
I've been wondering about this for awhile and have never found or read about a solution. Here's the situation example: You hit Command S to save and a modal window pops up with 2 options, Save and Cancel. Save is highlighted but I've decided I want to cancel. How do I via the keyboard choose the non-highlighted option? On the PC it's simply the tab button, but i've never been able to figure out what it is on a Mac. Thanks.

There are a few potential answers to this question.

All Controls

OS X offers a system-wide setting that allows you to control various parts of the interface using only your keyboard. First, you need to change a keyboard setting. Open System Preferences, and navigate to Keyboard → Shortcuts (this navigation might differ slightly on pre-Yosemite builds of OS X, try searching if you can’t find it). You want to change the “Full Keyboard Access” setting to “All controls”:

image

Now you can use to navigate various UI throughout OS X. Next time you’re in a modal dialog, try using and ⇧⇥ to navigate back and forth through available buttons. You’ll see a halo around the selected button, and you can use the spacebar to activate it.

Single-Key It

Next time you have a modal on screen that has a cancel button, try just hitting . Most modals support escaping.

Bonus

Sometimes when closing a document or app you’re asked if you want to save what you were working on. In a case like this, you might not want to cancel but instead choose “Don’t Save”. Next time this happens, save time and use the default shortcut for this in OS X: ⌘⌫

Task Switching Tips

Let’s say you minimize a Safari window to your dock. 10 minutes later, you’re working in Typed and you want to reference something in that minimized Safari window. So you hit ⌘⇥ to bring up the task switcher, tab over to Safari and release . Except that minimized window doesn’t pop open, it stays in the dock when Safari takes focus. Before today, you were probably using your mouse to click on the minimized window and muttering under your breath. Reader Ed Lipp, Jr. reminded me of one solution to this problem:

Next time you task-switch to an app with a minimized window, hold while releasing and the minimized window will restore.

But let’s say you have a few minimized windows and you want to restore a specific one when switching to an app. Task-switch to an app and (while still holding ) hit the 1 key. This will switch you into window selection mode, which supports arrow-key navigation. Arrow over to the window you want restored and hit . Boom, app is in focus and your window is restored.